Here is quick guide of how to show your supply voltage on your fish finder. This is a simple thing to do if you are running a Lowrance TI unit so you don’t have to worry about installing a separate voltage gauge. By having a voltage gauge on your unit, you can keep an eye on your battery level while you are on the water.
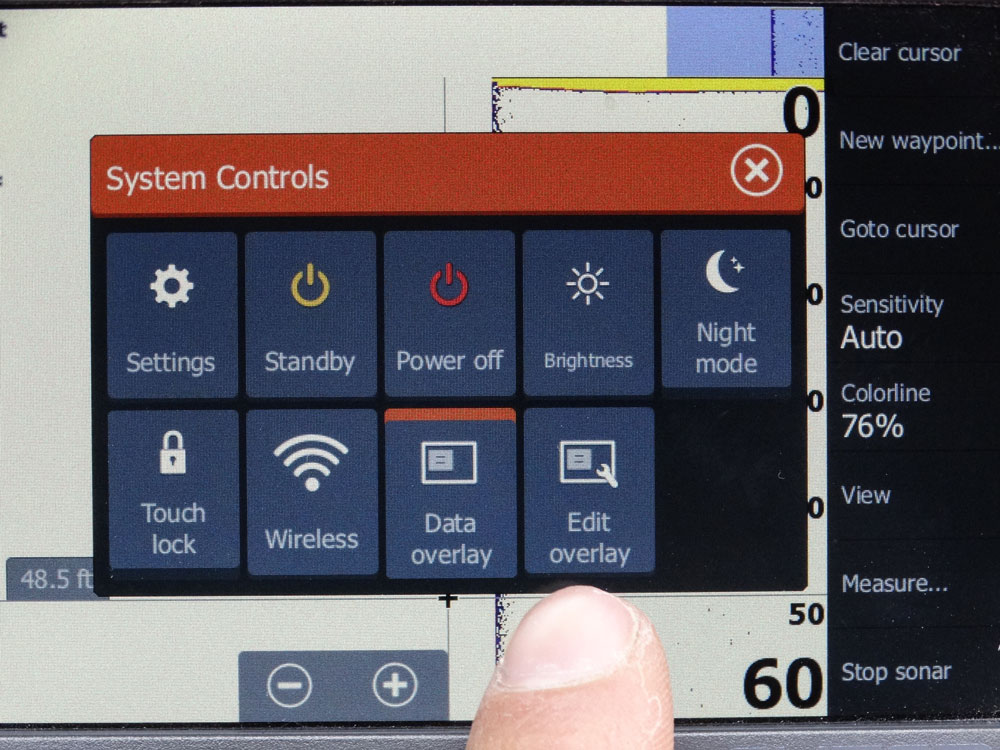
The first thing to do is tap the power button on the bottom right to bring up the following screen. Make sure “Data Overlay” has the orange indicator at the top to ensure this can be shown (Press this icon if it is not to toggle it on). Press the “Edit Overlay” icon as shown.
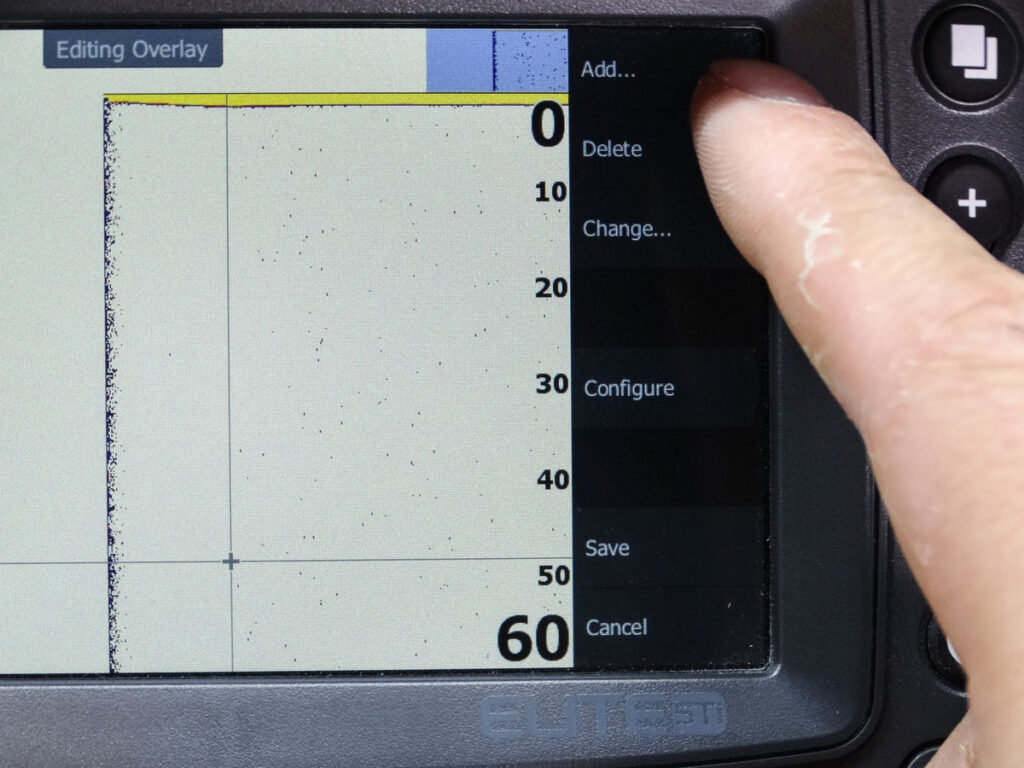
Press the “Add…” icon at the top right of the screen.
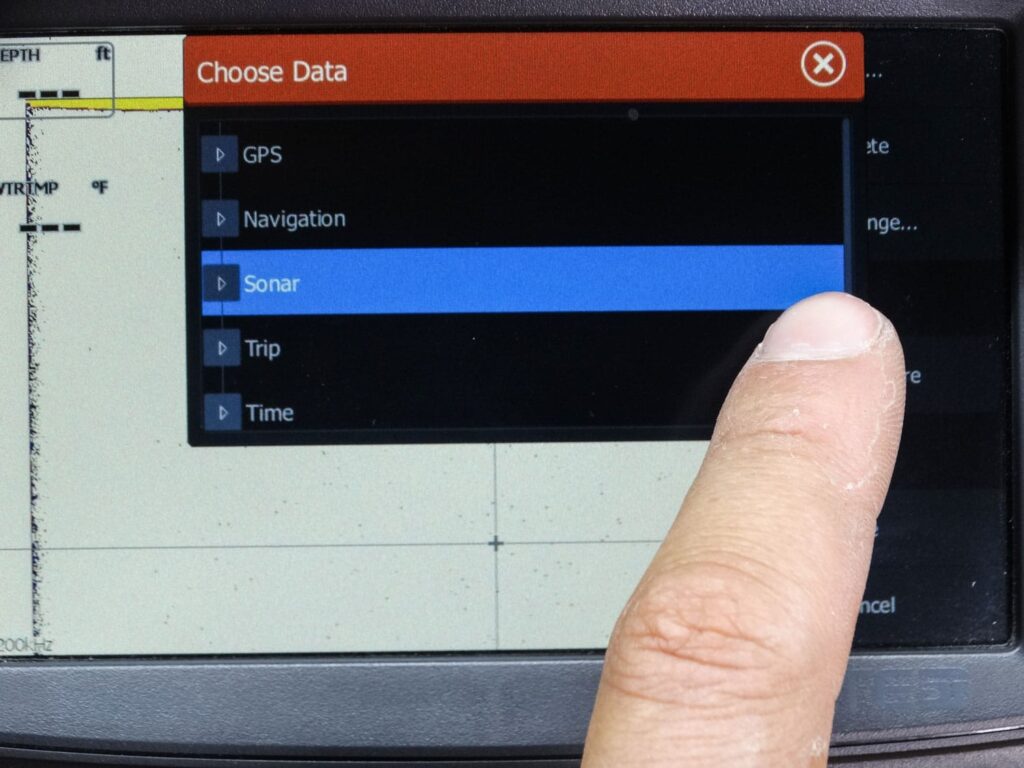
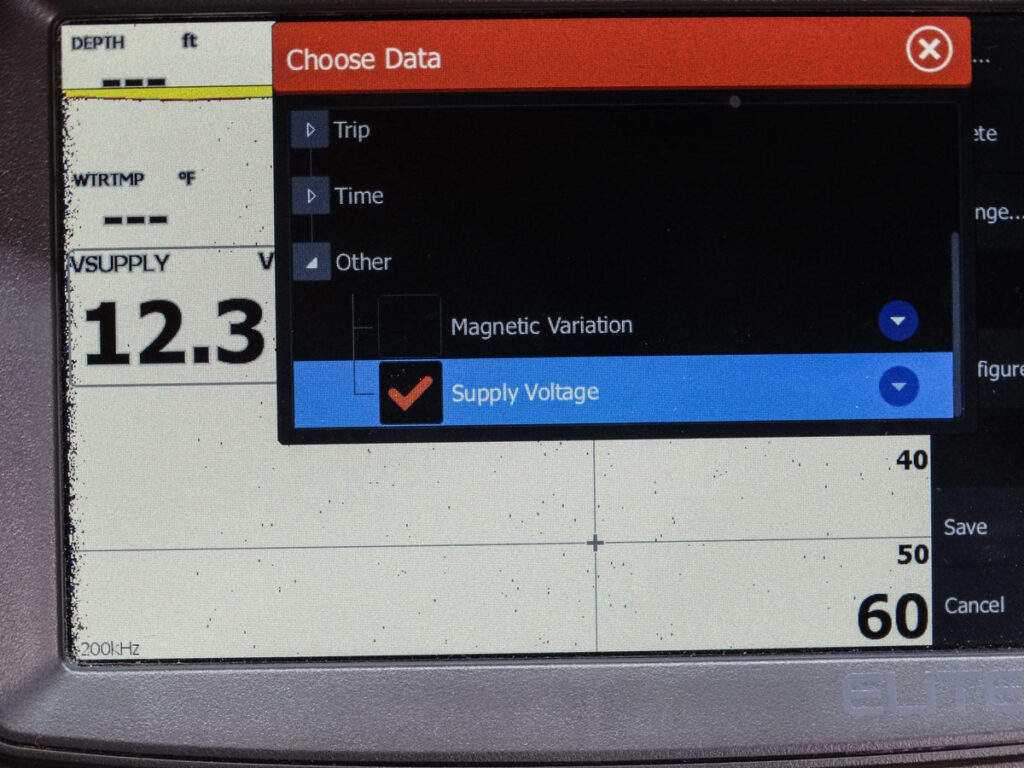
On the “Choose Data” screen scroll down by pressing your finger on the screen and moving it upwards.
Select “Other” and then select “Supply Voltage” so a tick is shown in the box as pictured. The supply voltage should be shown on the side with VSUPPLY above it.
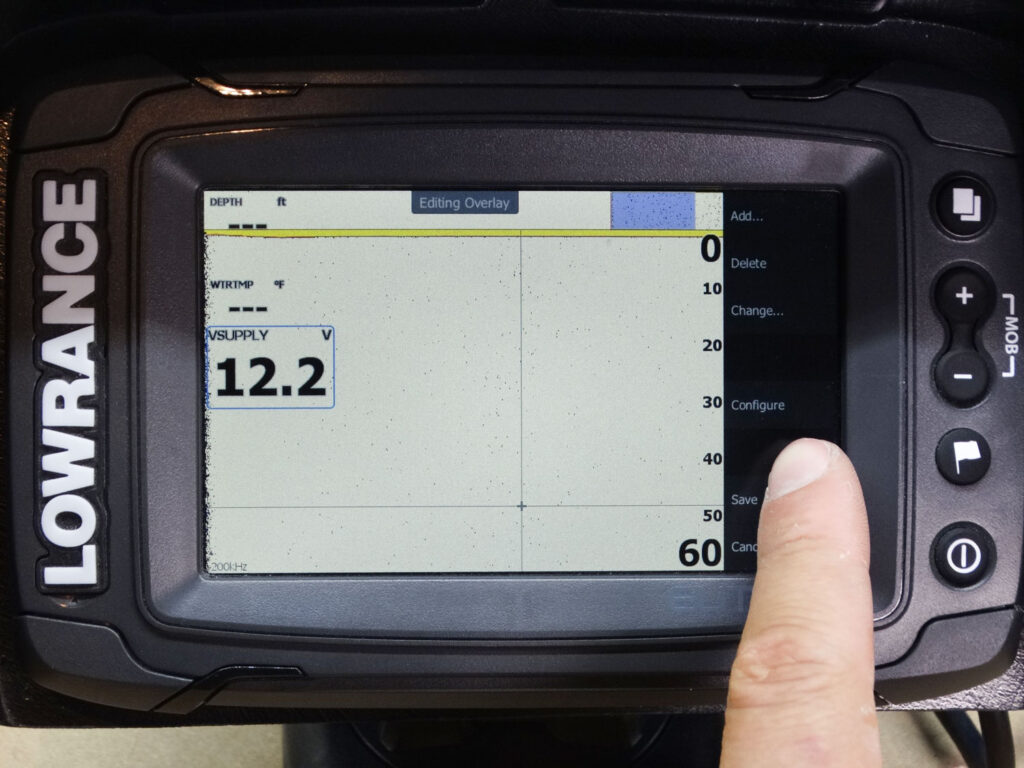
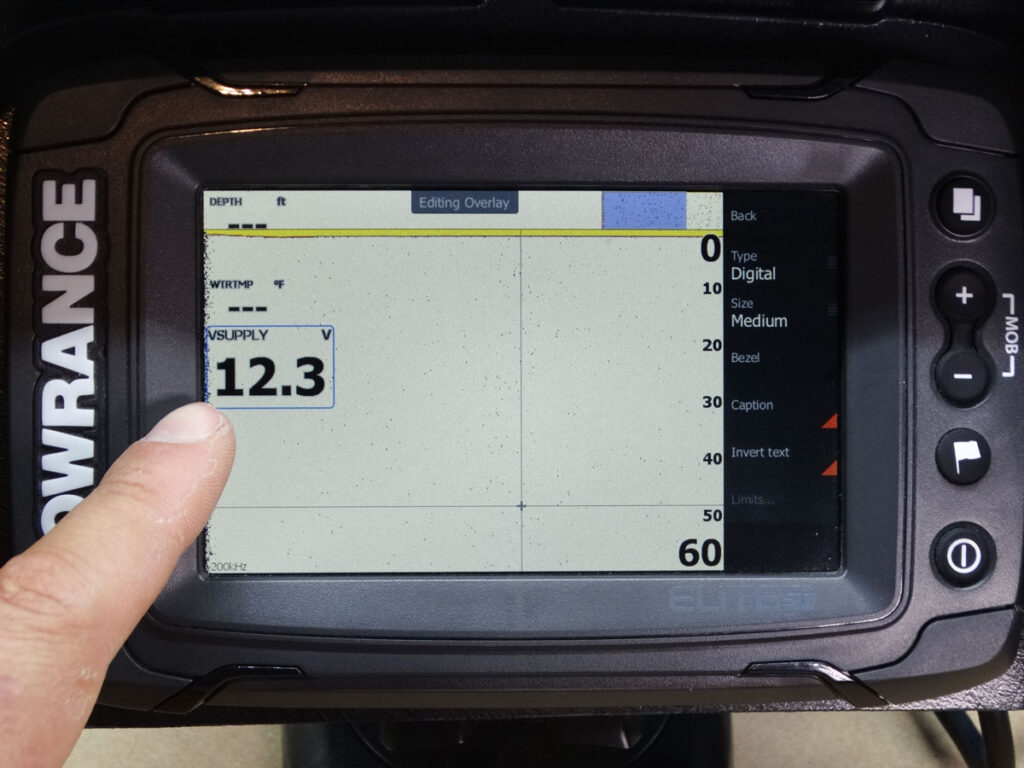
The supply voltage is shown quite large from default. You can change this by pressing the supply voltage data so the blue box is highlighted around it and then by pressing configure.
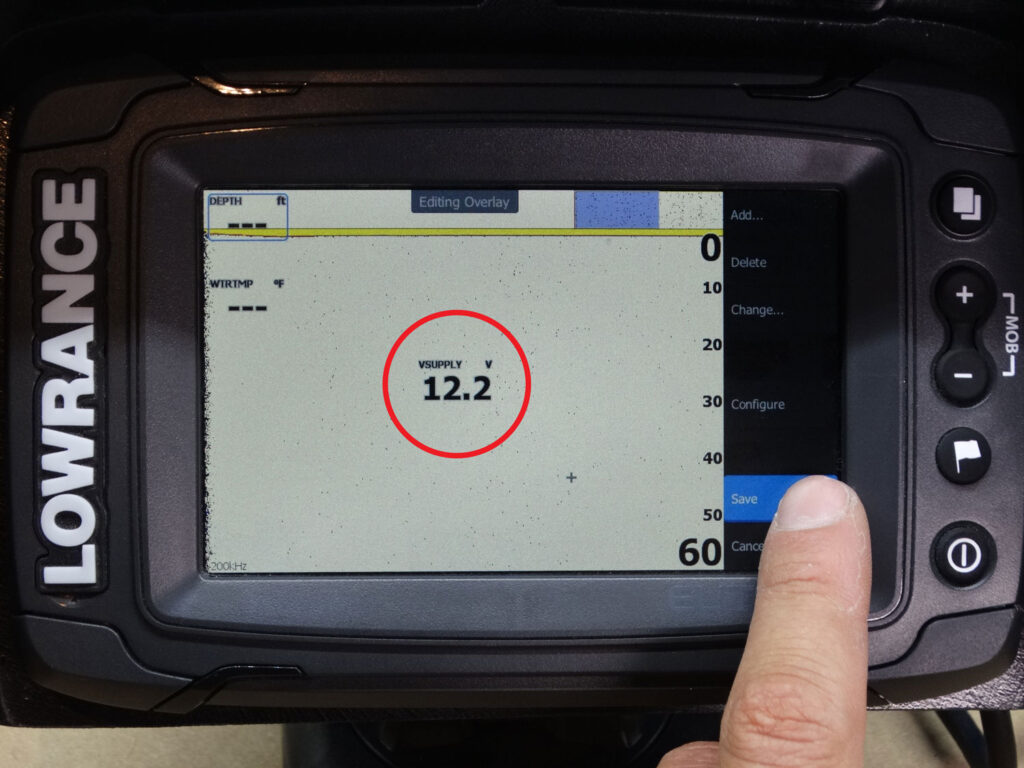
This gives you the ability to change the size of all your overlay data plus you can position it anywhere on the screen by pressing the data and dragging it.
Once completed be sure to click “Save”
Here is a quick guide for what voltage you have in regards to how much battery life you have left.
| State of Charge | Sealed or Flooded Lead Acid | Gel battery | AGM battery |
| 100% | 12.70+ | 12.85+ | 12.80+ |
| 75% | 12.40 | 12.65 | 12.60 |
| 50% | 12.20 | 12.35 | 12.30 |
| 25% | 12.00 | 12.00 | 12.00 |
| 0% | 11.80 | 11.80 | 11.80 |
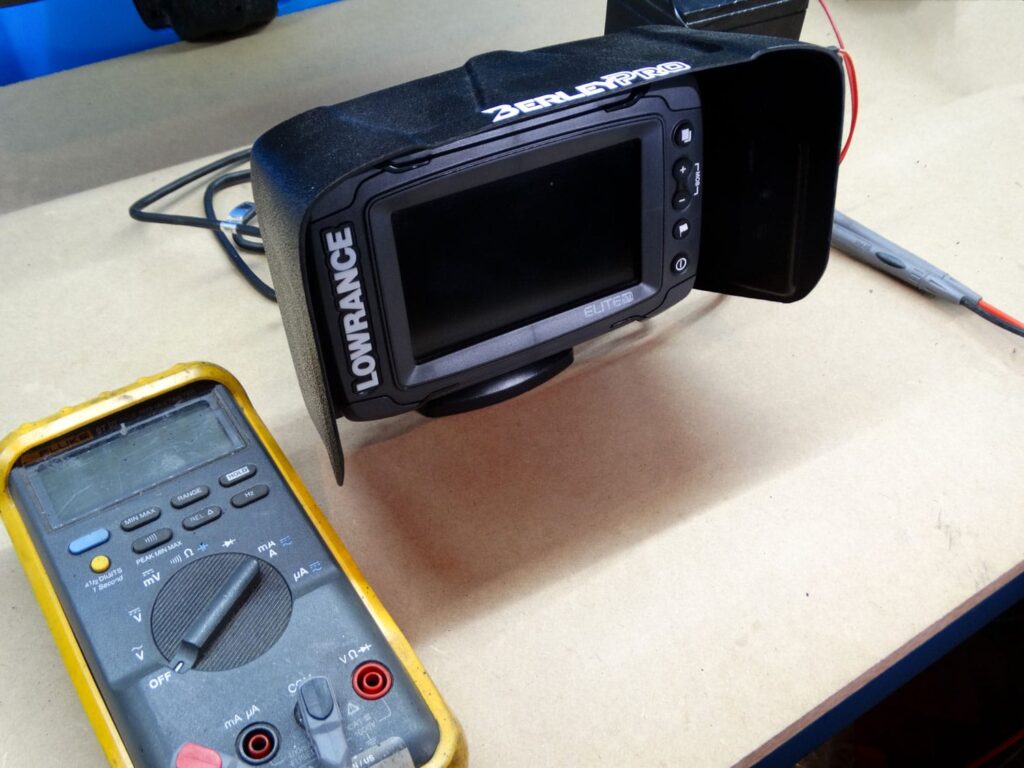
These new fish finders do draw a considerable amount of power. I recommend doing everything possible to save that battery life for long days on the water. You can do this by turning the wifi off and dimming the screen. We also make a range of fish finder visors that can help keep the glare down so it still remains easy to read when you are turning down that screen brightness.
I hope this helps!


1 comment
gary trim
looks pretty goodto set up lets hope so