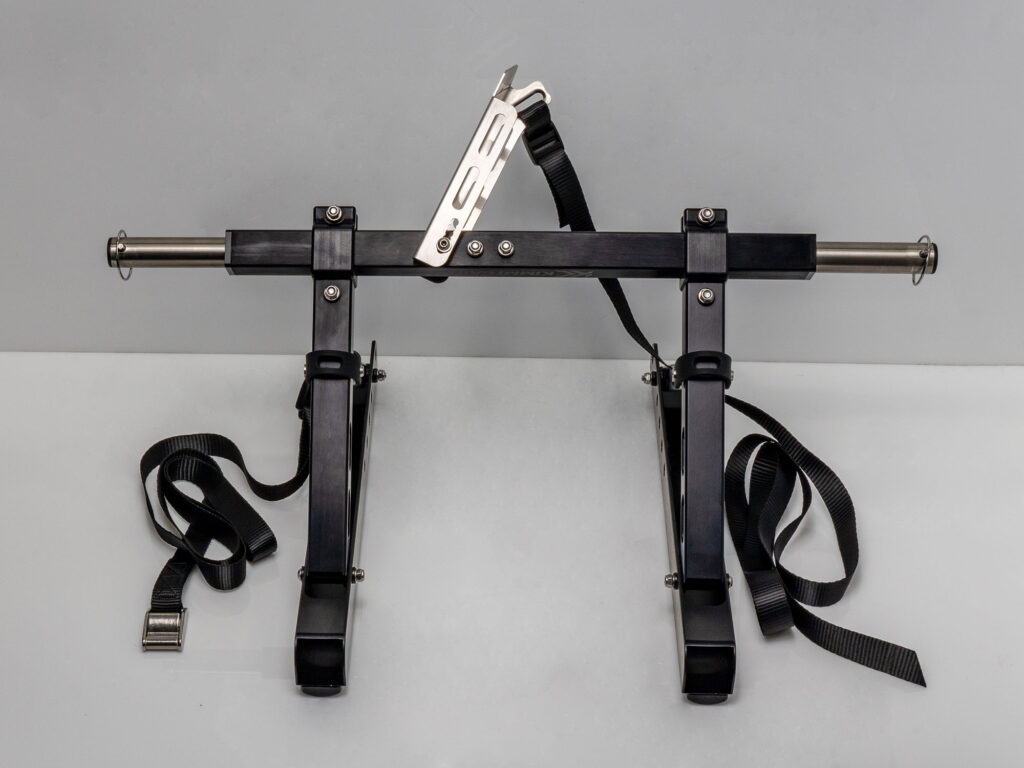
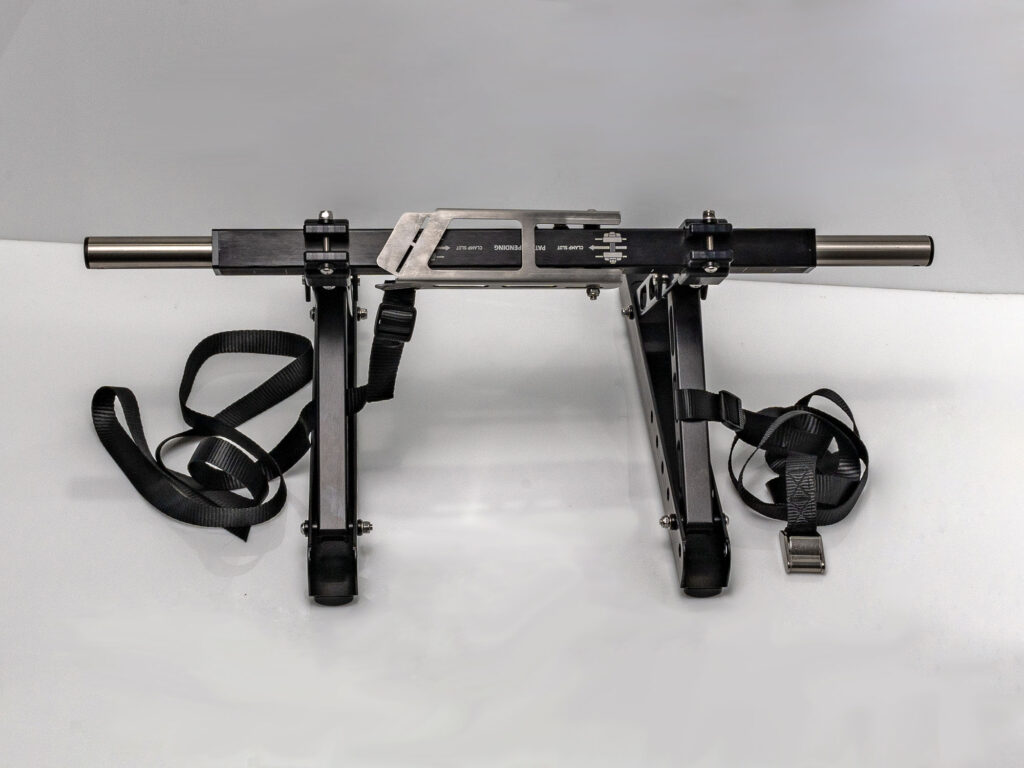
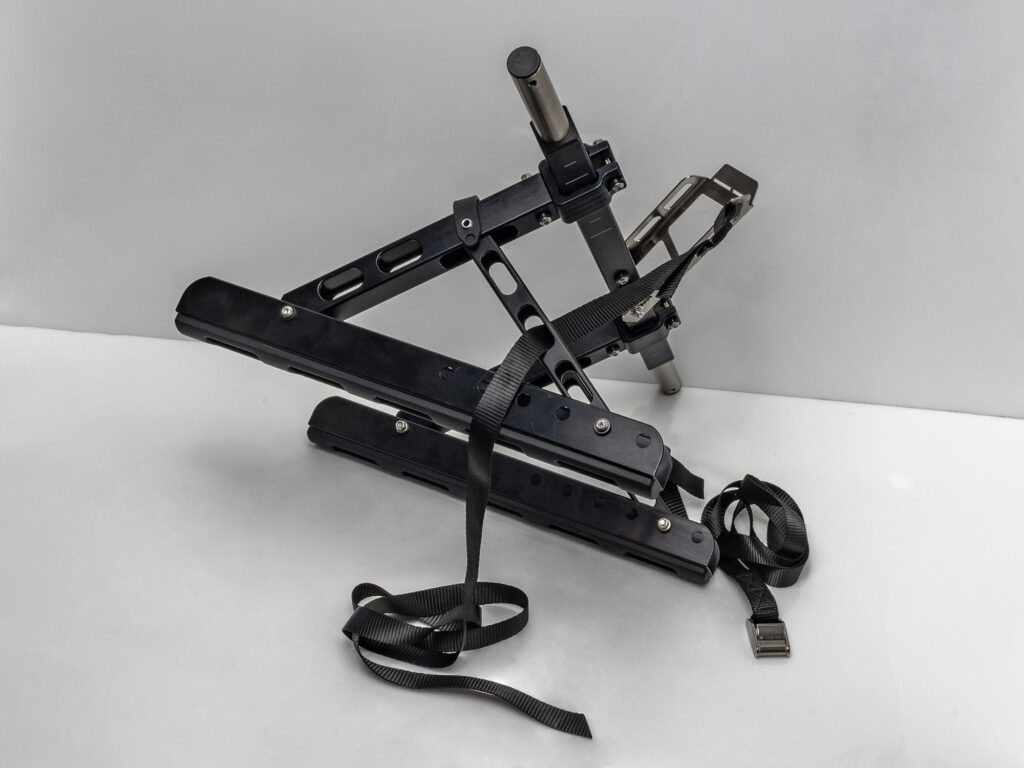
The Kimmi Cart now comes partly assembled to make life even easier. It’s a quick and simple process to have your new kayak transporter ready for action:
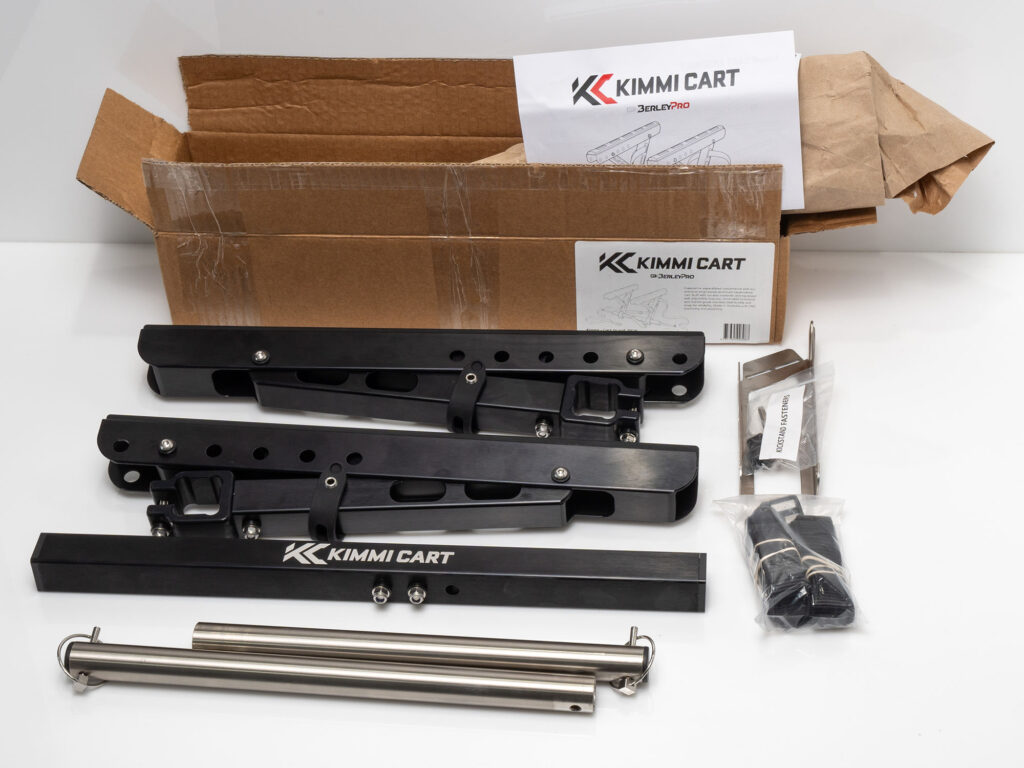
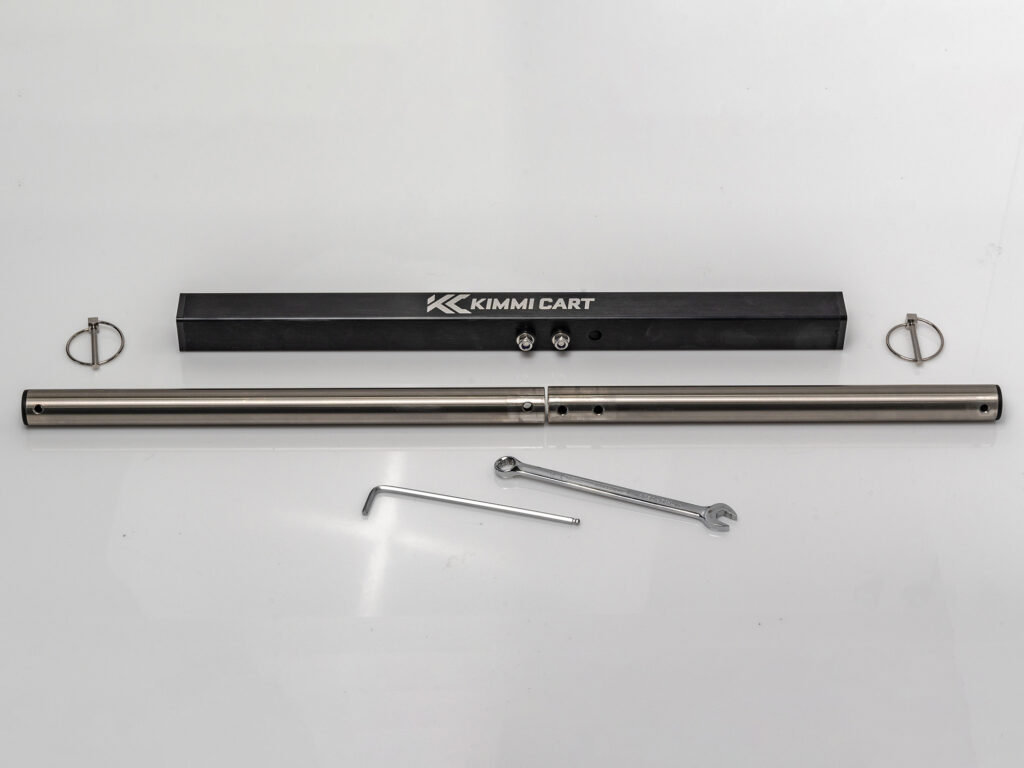
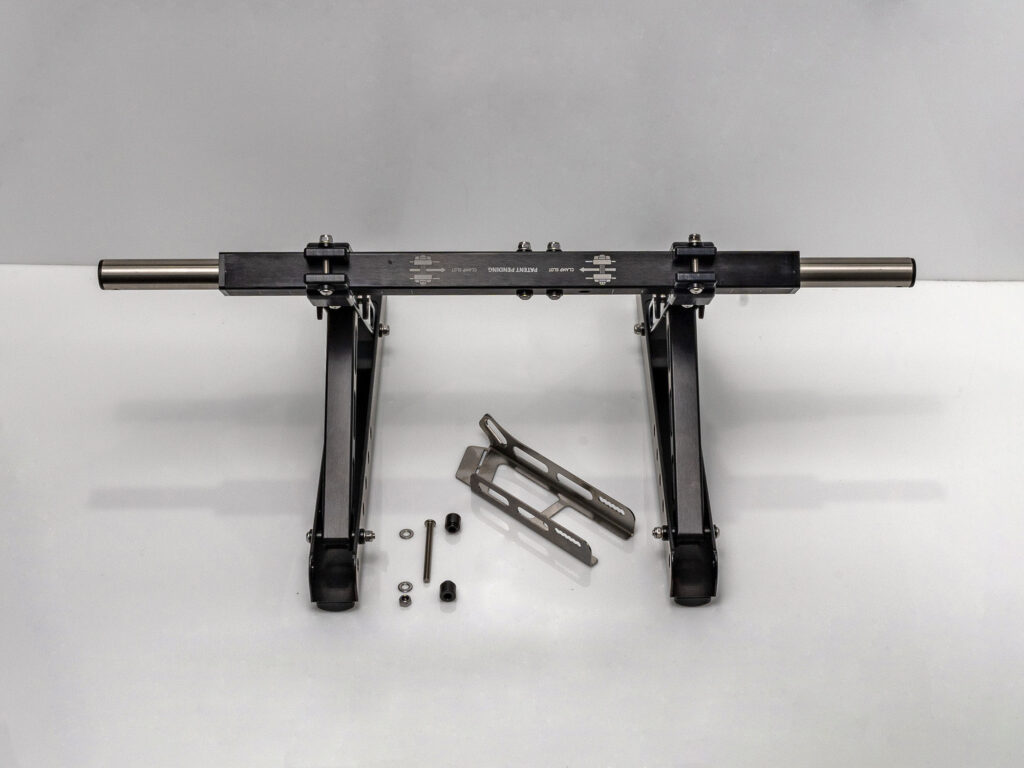
Step 1: Unpack the box: Unpack the box and you’ll discover 2x kayak bunks and their arms, one axle housing, 2x axles and lynch pins (or R-clips), the kick stand and fastening kit, and the tie down straps. For assembly all you will need is a 4mm hex key (Allen key/wrench) and a 10mm spanner.
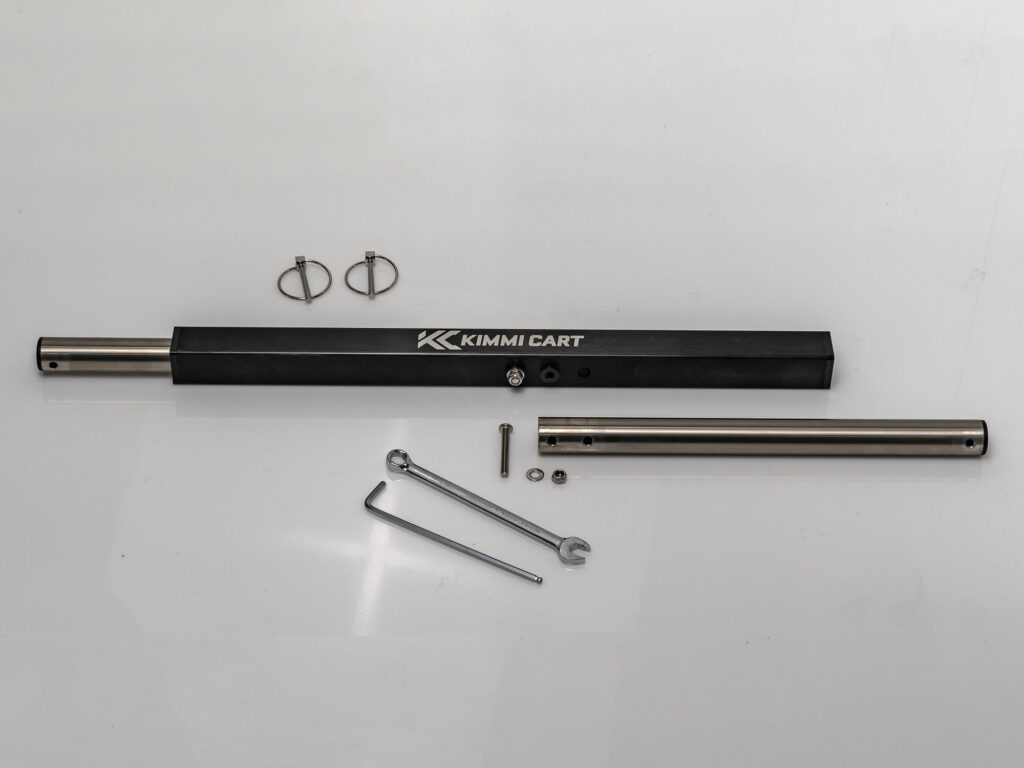
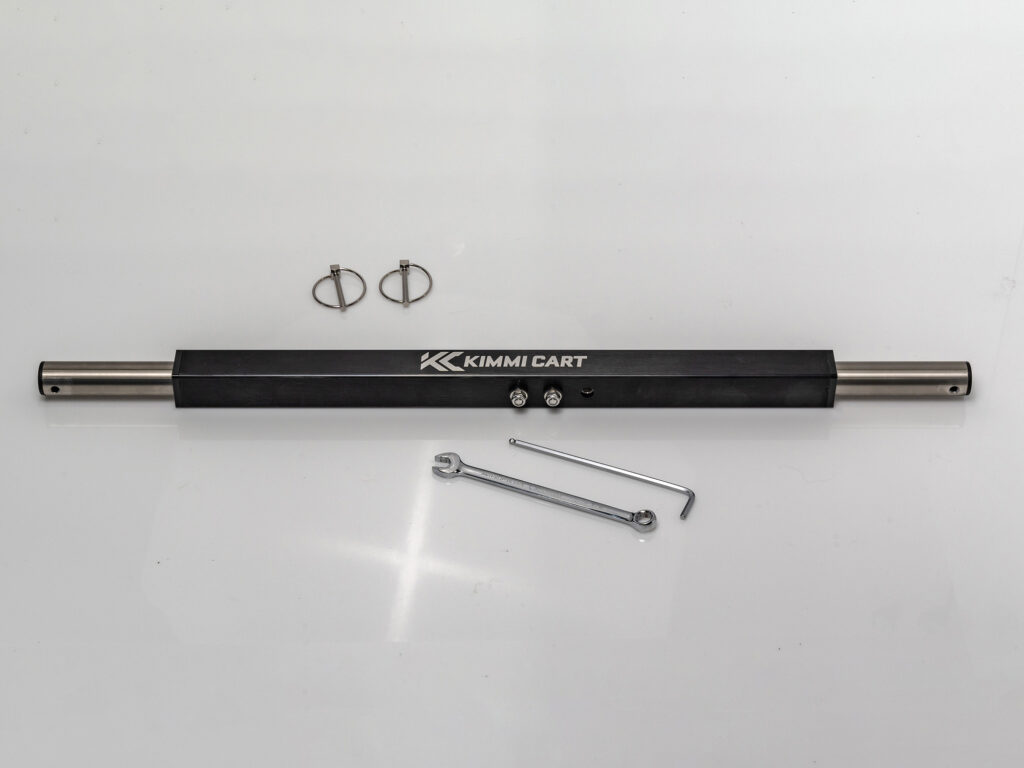
Step 2: Start with assembling the axles into the axle housing: The easiest way to find which way round they’re assembled is to lay the axles beside the housing and line up the holes. Simply remove one machine screw, washer and nut, and install that axle before proceeding with the other. Always make sure the black plastic spacers between the stainless screws and aluminum parts go back in place.
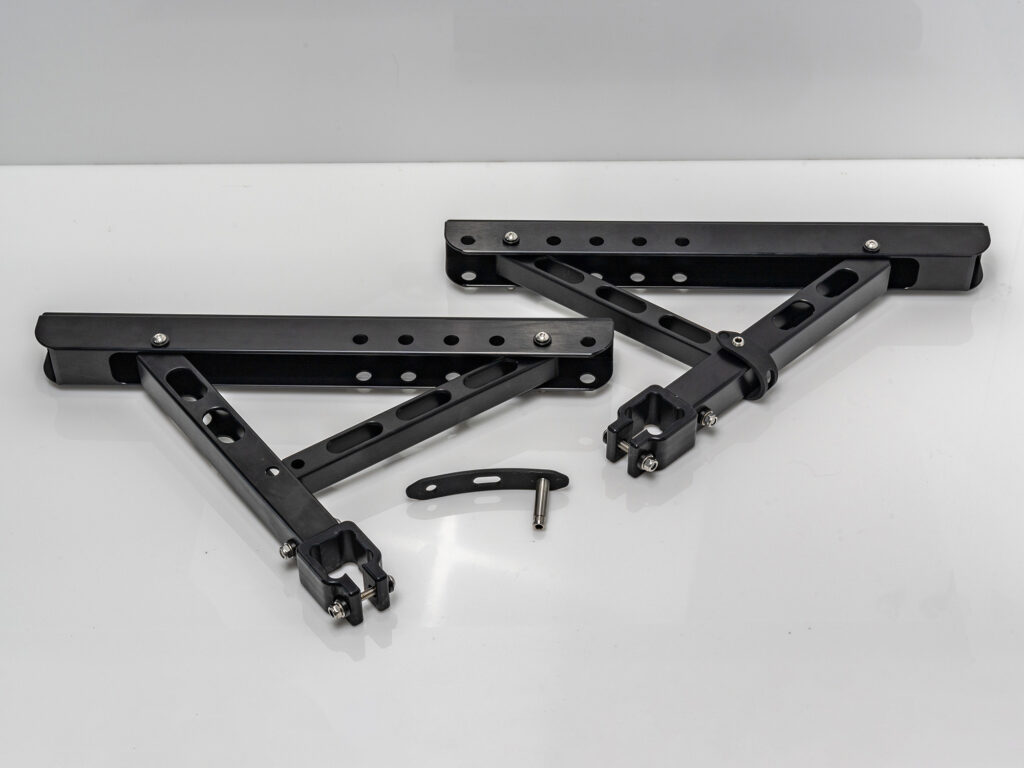
Step 3: Unfold and set the kayak bunks: This couldn’t be easier, simply unfold each arm, remove the release pin (the silicone strap pulls off the tapered end), align the holes, then replace the pin. This is the Kimmi Cart folding mechanism once fully assembled.
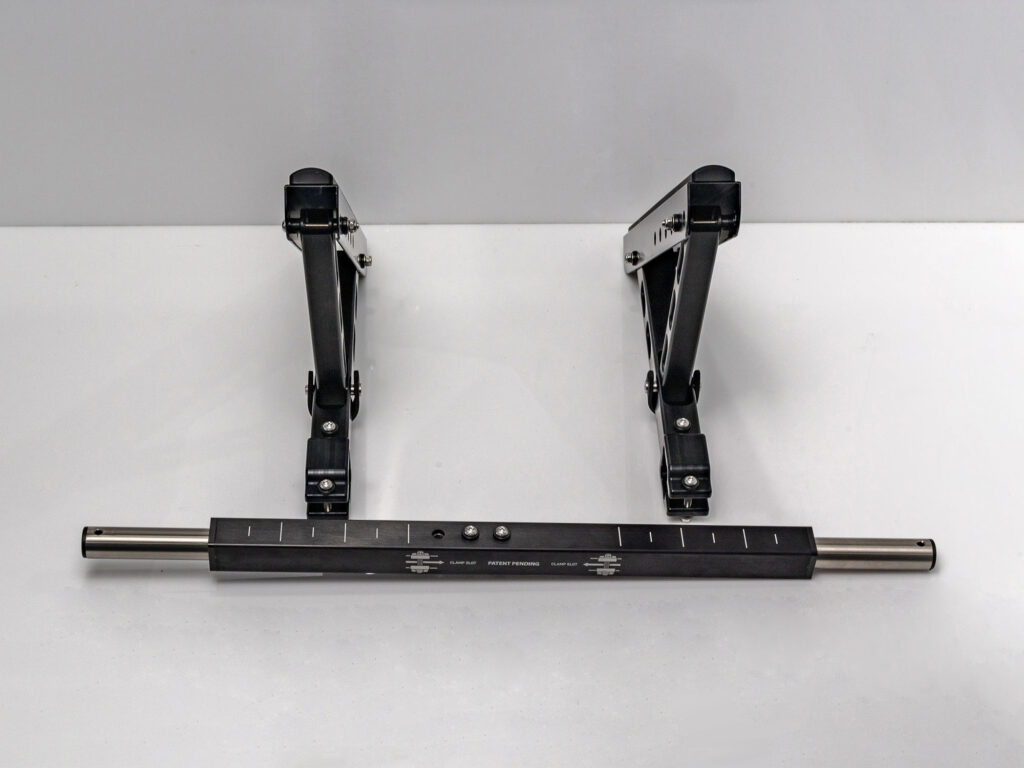
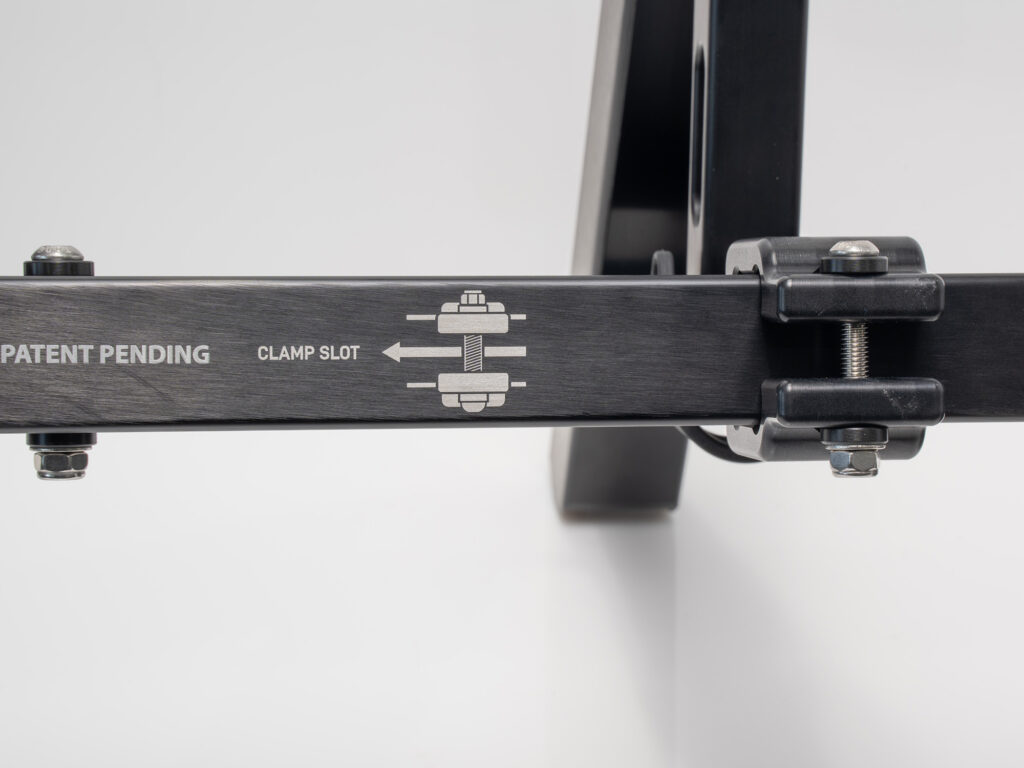
Step 4: Fit the arms and axle assembly together: To fit the arms lay the axle assembly on the floor with the “KIMMI CART” label facing away, and the alignment ruler facing up. Now stand the arms on their backs behind, with the clamps on the floor. This is the correct alignment for sliding them over the axle ends and into position. Note that the open slot end of the clamps should end up aligning with the “CLAMP SLOT – PATENT PENDING – CLAMP SLOT” labelling on the axle assembly. Space the bunk arms to fit your kayak hull (the index marks on top of the axle help ensure even spacing) then tighten the clamping screws. Please Note: excessive force isn’t needed as the clamps have ample surface area for a secure grip.
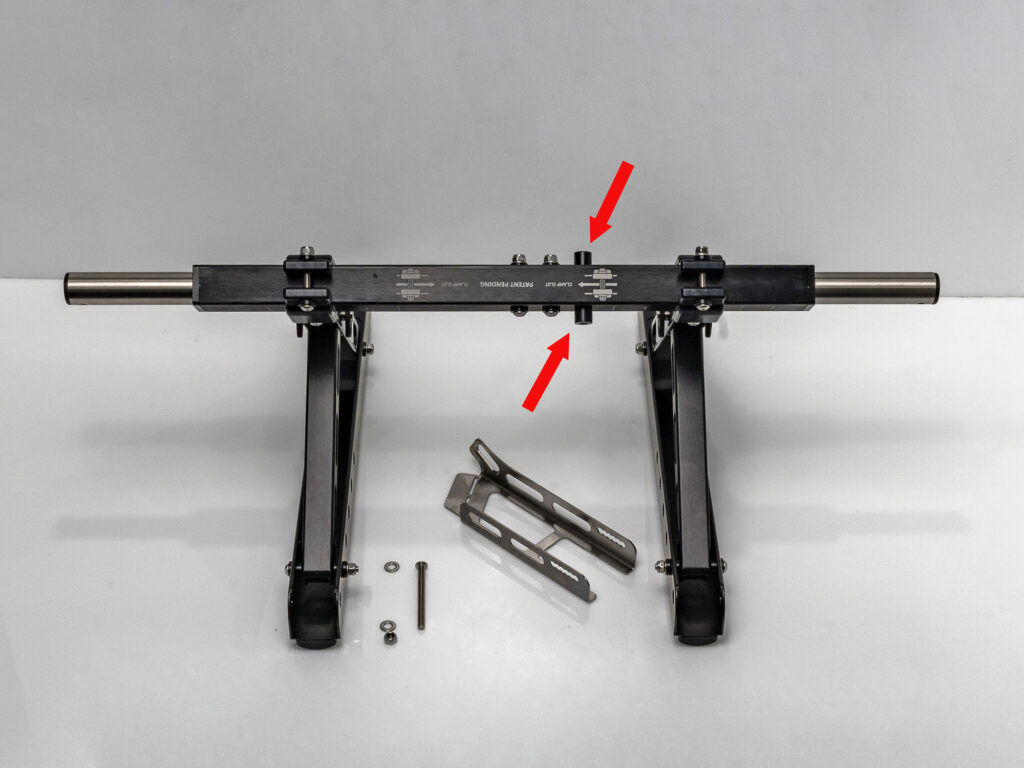
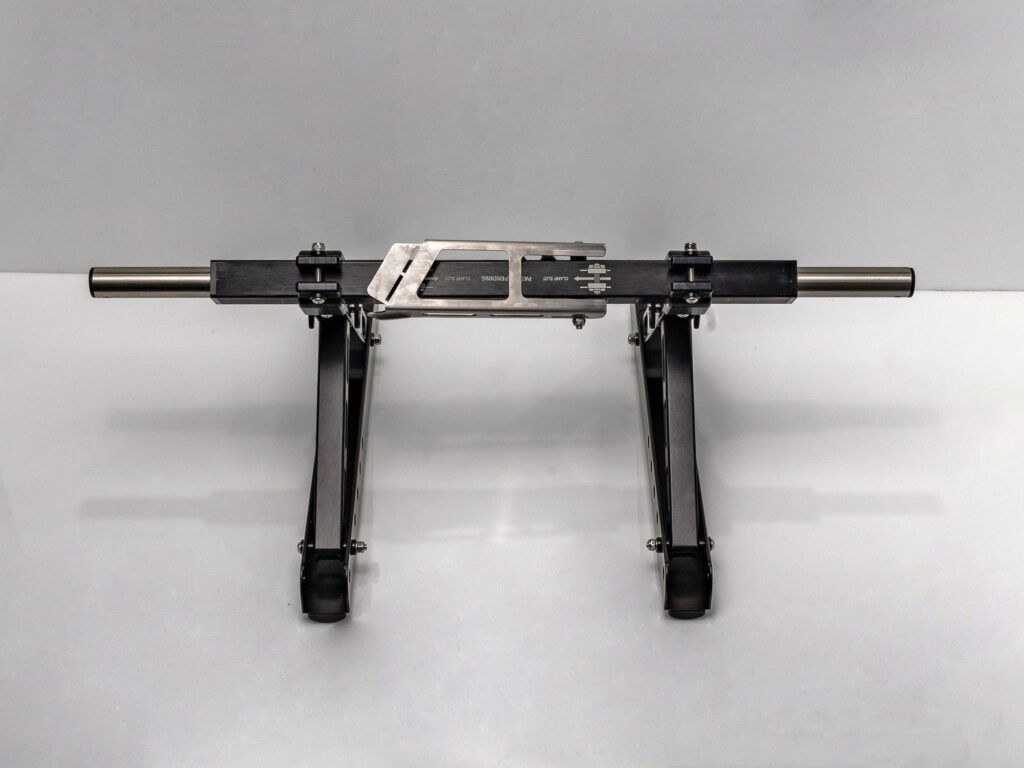
Step 5: Fit the kick stand: Lay the Kimmi Cart on the kayak bunks with the axle assembly in the air. The kick stand is fitted over the “CLAMP SLOT – PATENT PENDING – CLAMP SLOT” label using the 2x plastic spacers, M6 x 70 machine screw, 2x washers, and nyloc nut. This is tightened to a light friction fit so the kick stand can be moved easily, but will still support the Kimmi Cart when standing upright on its wheels. The adjustment slot on the kickstand allows the cart to accommodate a variety of wheel diameters – adjust position to suit your needs. The tab at the foot end of the kick stand has slots cut to make it easy to bend with pliers for a bigger footprint on soft surfaces if needed. Please note: the plastic spacers must be installed as indicated for a correct friction fit and operation of the kickstand.
Step 6: Fit the tie-down straps: Start with the plain strap without the stainless camlock buckle attached. Fit the plain strap to the tapered slot at the toe of the kickstand using the provided nylon buckle. The long end can then be routed up through the middle slot of the height adjustment bar on the opposite side of the Kimmi Cart. When this strap is tightened to secure your kayak on top of the Kimmi Cart the tension will automatically raise the kickstand for you. The other strap with the stainless steel camlock buckle can then be attached to the middle slot of the other height adjustment bar. Please note: if your straps rub on the wheels you’ve chosen for your Kimmi Cart shift the straps to the end slots immediately below the kayak bunks.
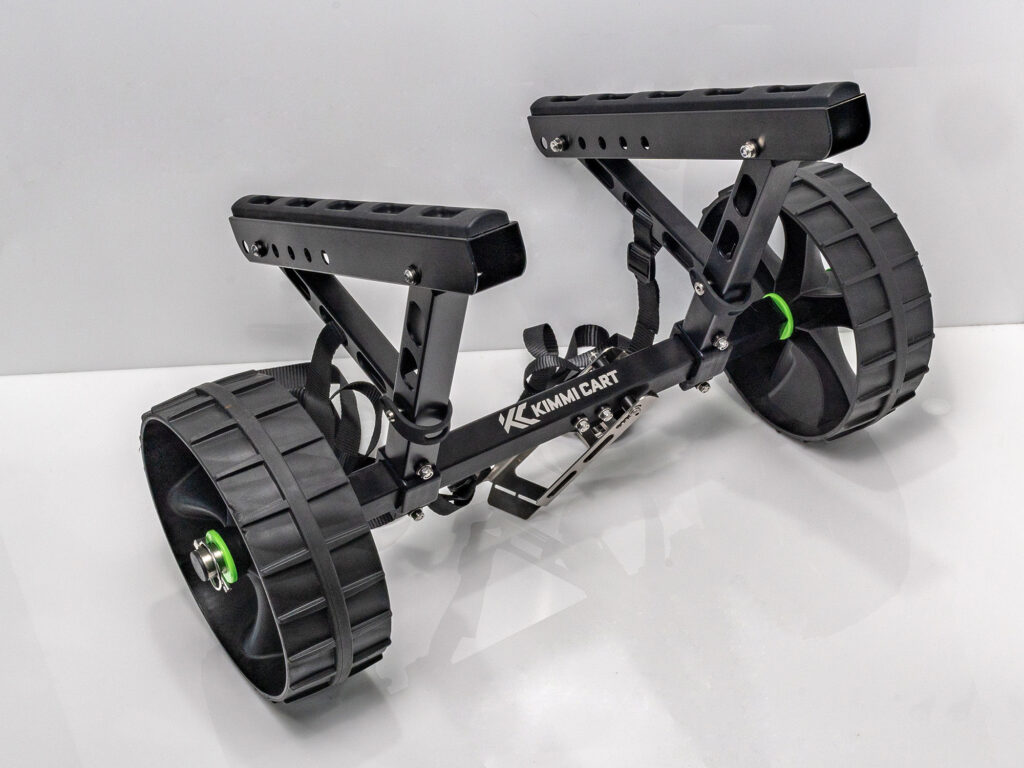
Step 7: Fit wheels and final check: Your wheels can now be fitted using the lynch pins (or R-clips) provided and the Kimmi Cart stood upright on its kickstand. Adjust the kickstand screw tension so it has just enough resistance to keep the cart upright for loading your kayak. If needed, the height adjustment arms can be moved to any of the other hole positions to place your kayak just above your wheels without them rubbing on the hull.
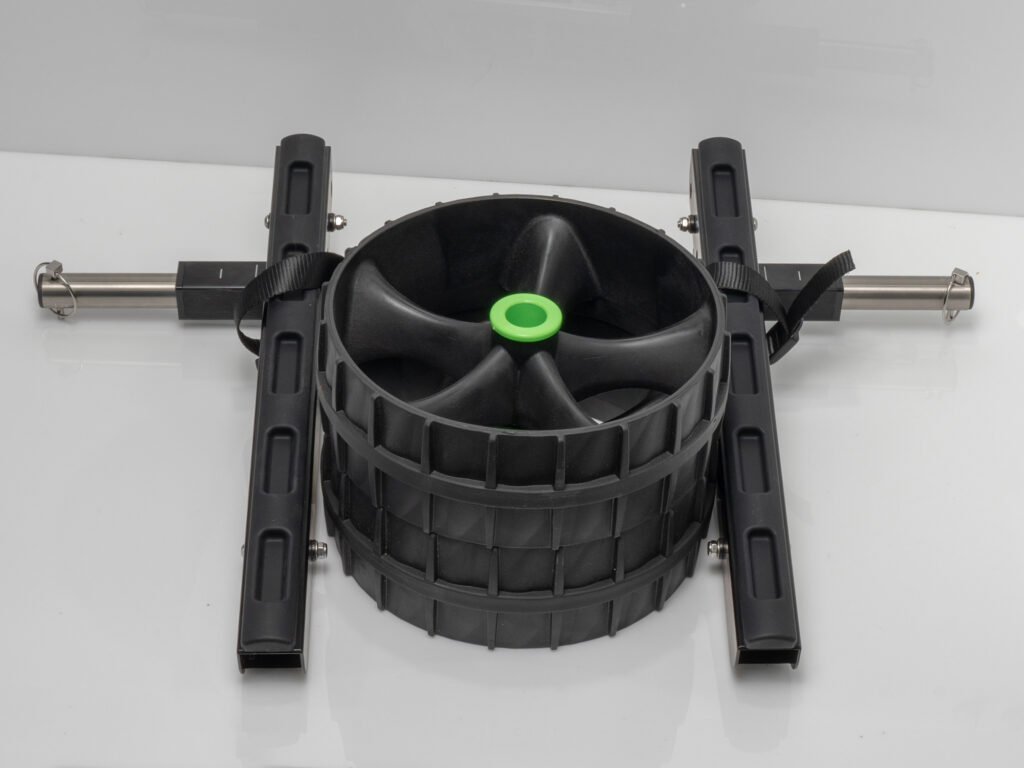
To fold your Kimmi Cart for easy transport simply remove the wheels then remove the release pins to free the other ends of the height adjustment arms (reverse of Step 3 above). These arms then fold inside the kayak bunk arms allowing the cart to fold flat. The release pins should always be reinserted in their holes in the legs for safe storage.
Please note that some components may appear different to those in the images here. This Kimmi Cart has axles and lynch pins to suit C-Tug wheels. Kimmi Carts supplied to suit Wheel-Eze wheels will have solid axles and R-clips as retainers.
