When you’re talking kayak storage there are a lot of good options on the market and unfortunately a lot of bad options. We’re going to try and unpack the good stuff from the bad and provide you with some advice on what it is that you actually need.
The key things you should do when planning the storage layout of your kayak is to consider:
- What you need in a hurry
- What you don’t mind reaching for
- Things you don’t need to access when you’re in the seat.
If you take nothing more out of this article, aside from the idea you should arrange your gear with these prioritise in mind, then you are on your way to setting up your optimal kayak.
1. What you need in a hurry
- Your immediate cockpit area is the most valuable area you have available to you. We recommend only keeping things in this area that you use regularly and that would be a hassle to reach for and grab every time you needed them. Common examples include pliers, knives, scissors, scents and your water bottle. If you’re offshore you may even include safety equipment like your radio or location signal device into this category.
- A lot of kayak companies recognise this and have produced kayaks with built-in side pockets, whilst they are often positioned well, they are often made from soft cheap material and constantly catch and attract hooks, trebbles and jigheads. To counter that we have manufactured the BerleyPro Side Bro, Prison Pocket and Jig Buckets. Whilst they are all designed to sit on the side of your kayak their moulds are slightly different and account for your requirements. Personally, I am an Australian Estuary fisherman and the equipment I use tends to be smaller than that of an offshore fisherman, I also rarely carry a knife so I have chosen the slimline jig bucket. The two pictures below are two different ways to mount the must have fishing kayak accessories. On the side of the kayak or by using a Van Bro attachment on the side of a seat.


What side to mount it on?
Prior to drilling into your kayak we recommend that you film yourself naturally catching a fish then review where and how your hands move. You should consider your movement and which hands you use for the rod, net, steering handle and where you have your sounder located. That way you are being as efficient as possible and don’t get cross armed trying to reach for something when you’re fighting a fish.
2. What you don’t mind reaching for
- Into this category goes line, leader, baits, lures, scales, rulers and scales. Things that’ you will use during your fishing session but you can afford to place them in a crate or backpack.
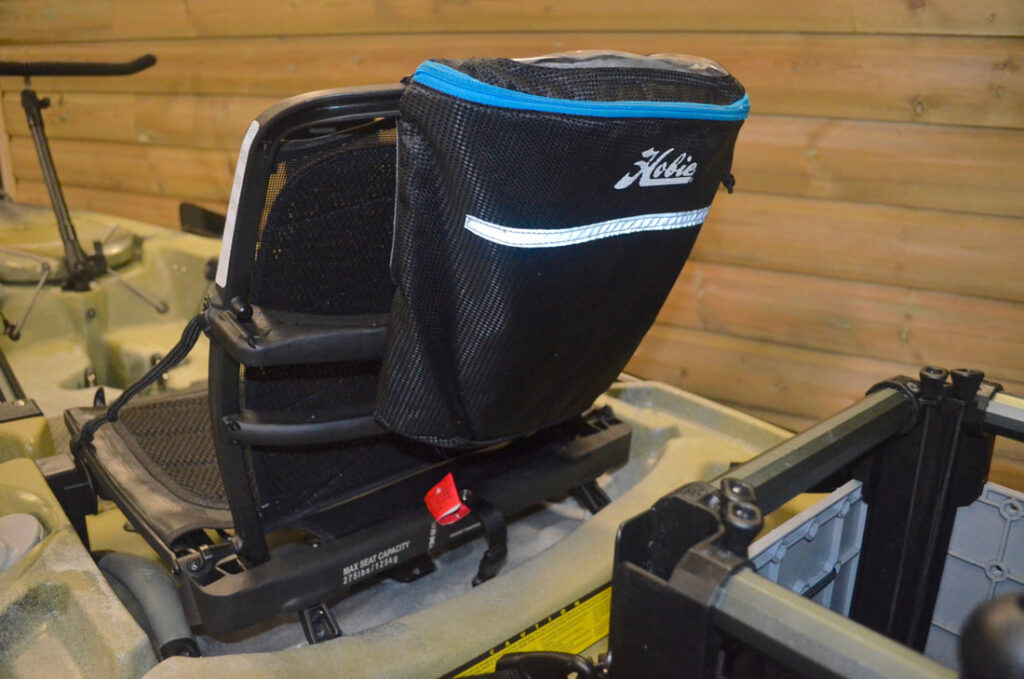
- Two of the items a new kayaker should consider are a tackle crate and a seat storage bag. The tackle crate can be as complex as a Hobie H-Crate jigsaw puzzle or as simple as a cut down milk crate with plumbers pipe attached to create rod holders. A ‘How to create a kayak fishing crate’ will appear on this website soon, so make sure you sign up to the newsletter to stay up to date without ideas. The crate tends to sit behind the seat and is great tool to drop your gear into that’s not being used. Make sure you secure the crate though, you don’t want it tipping over when you’re in the waves.
- One of the products we like on the market and think is worth its weight is the Hobie Vantage seat accessory bag. Now I know it says vantage seat but the Velcro attachments are adaptable and will fit any seat you can glue Velcro to. Fitted the bag is an easy access twist of the waist and you are there. The bag is handy for line and leader and things that you want to protect from the sun, easy zipper access.
3. Things you don’t need to access when you’re in the seat
- Lastly this is where I keep my car keys, frozen lunch, batteries, wet weather gear and changes of clothes. The Front Hatch and the Front hatch bag.
- Any waterproof bag will work here and a lot of kayakers like waterproof bags to keep their valuables dry and we think that’s a great idea. Some like a cooler bag to keep their catch fresh or their lunch cool. There are a number of bags in the market but the most important is to find one that fits and is AGAIN waterproof. We recommend you start with a standard dry bag and adapt the bag to your needs, larger or smaller.
We hope these tips have given you a start and a good idea of where to go from here. Like we said at the start if you consider these three principles you’ll be on your way to an efficient and comfortable kayak.


